
 Imagine being in your RV anywhere north of Florida when December’s bomb cyclone hit. With temps plunging below zero in many areas, gas furnace could keep you warm. But even many “all season” RVs aren’t designed for bitter cold.
How can you improve your RV’s thermal dynamics to make the bitter cold less bitter? We were at Suwannee Hulaween music festival one year when the early morning temps were in the 30s. We flipped on the furnace and were comfy in no time. Heck, it was in the 70s by early afternoon. That’s Florida.
What about Montana, where sustained freezing temps can come any time – fall, winter, spring. Mother Nature lives to no schedule.
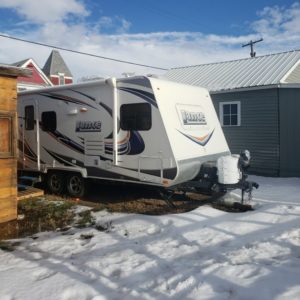
 Enter my brother, Darrel. He bought his Lance 1685 in Florida with plans to relocate it to his place in Montana. Knowing the winters are more brutal there than even the summers are here and more than his furnace would be needed to beat back the cold with live-in use, he decided insulating and heating it would be his next project.
Below is his recollection of the project. Given how much LP the trailer’s furnace would burn through, and that he’d be hooked up to shore power, he focused on electrical heat sources to make his Lance liveable. Some might call it a layered approach – adding a number of devices or solutions to any problem to boost the effectiveness of each.
He started with ceramic fans. Small with high-output, they warm the space with near-immediate heat. But they are power hogs. The folks at Drivin’ and Vibin’ recently had a collection of articles on the safey of space heaters and the best and worst camping heaters for winter roadtrips.
 His larger solution was an Envi Heater. The wall-mounted panel heater delivers safe heat, especially in a small space like a camper. Easy to install, simple to use, the compact heater draws only 500w, making it more energy-efficient than a camper’s furnace and less than the draw as a cube (or about $.05 of electricity per hour of operation, compared to other space heaters that can use up to $.18 per hour. Purchase price: around $180.
He installed it with a simple wall hanger behind the dinette bench in the slideout and plugged it into the 120 VAC. The Envi is so simple, he could add more as needed, like in the bed area or the bathroom. It is not instant heat. Its ambient heat. No moving parts, convection only. The Envi is designed to remain on at all times, to make a warmer space, across the walls, floors and ceilings.
Three Envis might consume only 15A. But if you use electric water heat, the microwave or other appliances, you’ll trip the main with electric heaters in use.
But by his estimate, with these heat sources and good insulation, he’d be OK down to the teens without the furnace for heat.
Insulating the Camper
 As far as insulating, he layered in Foamular, R-Tech and Refletix throughout the camper. He used Foamular, the purple insulation board that comes in various thickness and mostly 4×8 sheets. R-Tech is a lighter weight insulation board with a foil surface that also cuts easily on the foil side. Reflectix is a 1/4″ thick bubble wrap-type product with foil on both sides and which cuts with scissors.
He used Loctite Power Grab construction adhesive to affix insulation to walls, doors, hatches, etc. It dries quickly, cleans up easily, and creates a permanent bond for the insulation boards. He used staples for the Reflectix.
 The Foamular, with Loctite, insulated the interior of outside walls, like in the passthru or cabinet beneath the dinette bench. In any space where air conditioned or semi-conditioned space was to be insulated, I used foil backed R-Tech or Reflectix with the foil side facing the semi or conditioned space.
 The foil, however thin, reflects thermal heat. As with all insulation using foil, the foil attains optimal efficiency when the foil is not placed directly against a non-conditioned cold or exterior wall or window. Any air space, even 1/8″, prevents thermal transfer of warmth to cold through the foil. Wood batts, thin strips of insulation sandwiched between thicker sheets of insulation works best.
Some hatches and spaces, however, are best just covered as best as possible with any insulating foam. I used maximum 1″ thick foam board products.
Addressing Other Weak Spot
He also used fiberglass batting (without paper backing) to fill zip lock bags and I then stuffed the bags in voids in the bath vanity, backs of kitchen cabs, and in easily accessed voids in the floor and plumbing areas. I wrapped as many accessible water lines as possible with Reflectix.
 The Lance has a large forward window with a rock guard on the outside, that opens like a shutter. Ideally, it would have been a two-pane thermal assembly. But it wasn’t, so it was the source of extreme heat loss. He cut a 1″ thick piece of foamular for the outside, and closed the window guard over it.
On the inside, he used Alien Tape on the walls of the camper and installed two panels of Reflectix with thin strips for a 1/8″ air space between the two sheets of Reflectix. He cut the entire assembly to have 2″ of overlap on the walls surrounding the entire window. Problem 100% solved.
Protecting other vulnerable spots
Of course, RVs have vents and skylights – all of which must be insulated. Since he has attractive removable, snap-on thermal covers over all of his, he just cut foam board to fit and stuffed zip lock bags of fiberglass batting inside as well. No more heat loss.
How did he protect those water lines? He’d run gas furnace to keep his water lines from freezing. Heat tape is a must if you’re living in a camper below freezing, and styrofoam boxes over the water intake lines is important as well. Heat tape is a flexible (like Romex) heated strip that can be wound around water lines, or attached to a hose with cable ties. The heat tape is plugged into a regular 120 VAC outlet. Some have thermostats and timers.
It’s best to shroud the assembly in appropriately sized HVAC insulating tubes. He still hasn’t addressed the sewer line. His thinking is he’ll maybe run heat tape along the bottom, with a styrofoam box around the whole run.
In a pinch, if freezing weather is the odd problem you can always just run a trickle of water in the farthest spigot as running water does not easily freeze unless it’s an extended, hard freeze. Then run the furnace to heat on-board lines, but running water will save your hose and outside bib from freezing.
His 1685 is an all-seasons unit. So it has improved cold weather properties. However, the main door is a problem. If he were in an ongoing, live-aboard situation, he’d create a removable, folding, rigid foam/Reflectix combo insulation panel for the door, and fashion a clever attachment to keep it in place if he were in the camper for the night or for longer periods.
If he were to stay in one location for a while, he’d skirt the bottom – or bring in hay bales – to line the trailer’s belly and keep wind from flowing through.
Adequate amps for the onboard 120VAC is a problem with electric heat. He did not, but will cut in a few integrated extensions to create additional sources of power beyond his 30A or 50A main service. This will allow him to plug heaters into them inside the camper.
Any RVer knows so much of RVing is the hack. Your solution doesn’t have to be store-bought or created for the situation at hand. Just be creative in tackling the problem at hand.
It’s been said there’s no such thing as bad weather, just bad clothing. While it can get bitter cold in Montana or anywhere a bomb cyclone may hit, keeping the RV warm can beat back the cold – at least until summer comes.